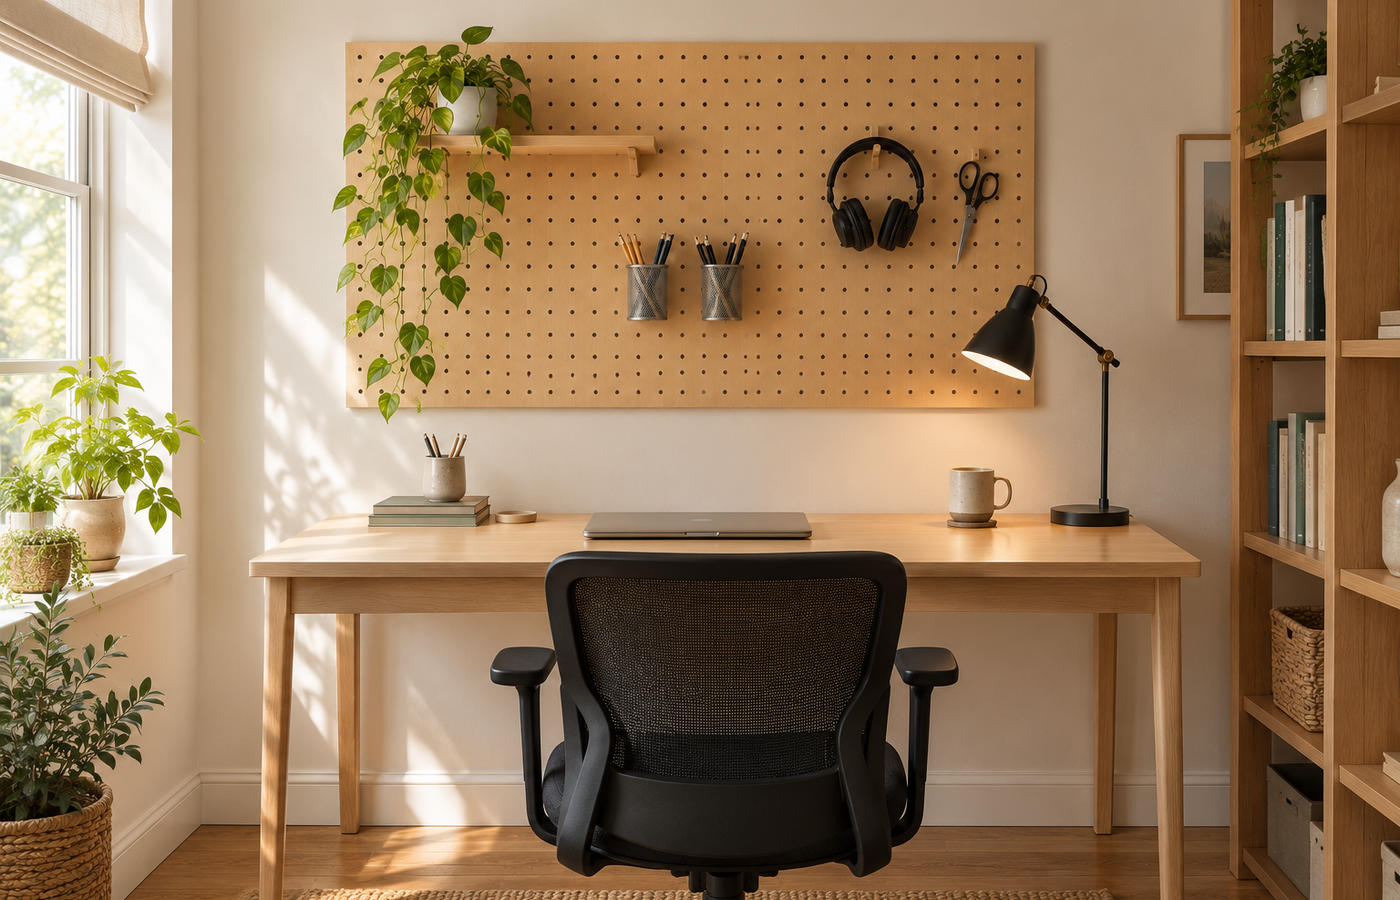
A small home office fills up fast. Chargers, headphones, scissors, notebooks and sticky notes spread across the desk until there is no room left to work. A home office pegboard wall moves all of that up onto the wall, where you can see it, reach it and rearrange it whenever your work changes.
This guide explains how to plan the board, the one measurement that makes it work, what to hang, how to do it as a renter, and the common mistakes that turn a neat pegboard into a cluttered one.
Why a Pegboard Works in a Home Office
Pegboard is a panel pre-drilled with evenly spaced holes that accept hooks, pegs and small shelves. That grid is what makes it so useful in an office: nothing is fixed, so you can move a shelf up, add a hook or swap a basket in seconds. A home office pegboard wall uses vertical space that usually goes to waste, and it keeps your desk clear for the work itself.
The 1/2-Inch Gap That Makes It Work
The most important detail is the space behind the board. Hooks need room to slip through the holes and hook behind the panel, so most guides recommend leaving at least a 1/2-inch gap between the wall and the back of the pegboard. Without that gap, hooks will not seat properly and will fall out as soon as you hang anything on them. Every successful home office pegboard wall starts with this one measurement.
Mounting It Securely
There are two common ways to create that gap. The traditional method is to screw 1×2 wood furring strips into the wall studs and then screw the pegboard onto the strips. The quicker method is a spacer kit, where screws pass through the pegboard and a small spacer into a stud or a hollow-wall anchor. Here are the basic numbers to plan around:
| Detail | Typical measurement |
|---|---|
| Gap behind the board | At least 1/2 inch |
| Standard hole spacing | About 1 inch apart |
| Wall stud spacing | Commonly 16 inches apart |
| Furring strips | 1×2 wood, one on each stud |
Treat these as rules of thumb and follow the instructions that come with your board and hardware.
Choosing the Right Board
Classic hardboard pegboard is the cheapest option and takes paint well. Wood or birch plywood panels look warmer and more furniture-like, which suits a home office pegboard wall in a living area. Metal pegboard costs more but holds heavier items and looks sleek and modern. Choose the material based on what you will hang and how much the board will be on show during video calls.
Sizing and Placement
Center the board above your desk rather than on the wall, since that is where you will reach for things. A common approach is to start the bottom of the board a few inches above the desk surface and keep the top within easy reach while seated or standing. A panel about as wide as the desk usually looks balanced; a smaller panel can look lost, and one much wider than the desk can overwhelm a small room.
What to Hang on It
Keep the things you use daily at arm’s height and less-used items higher. Good choices include pencil cups, headphones, scissors, a small shelf for a plant or speaker, a wire basket for notebooks, a cable holder, and a clip for your weekly to-do list. A home office pegboard wall works best when every item has a reason to be there, so start with a few essentials and add slowly.
Pairing It With Good Light
A board full of tools is only useful if you can see it clearly. A desk lamp beside the board lights both your work surface and the items above it. Our guide to desk lamp height for a home office shows how to place the lamp so it lights the desk without glare, and the same positioning keeps the pegboard evenly lit too.
Painting the Board
Painting a hardboard panel the same color as the wall makes it blend in and look built in. A contrasting color turns it into a feature, which works well in a plain white room. Use a small foam roller so paint does not clog the holes, and let it dry fully before you add hooks.
Doing This in a Small Home Office
In a small space, pegboard is one of the best ways to add storage without taking up floor space. It also works inside a closet office, where the back wall is often empty. Our guide to building a closet home office covers how to plan that kind of compact workspace, and a home office pegboard wall fits neatly on the back wall above the desk.
Doing This as a Renter
If drilling is not allowed, look for a freestanding pegboard that sits on the desk, a pegboard panel that leans against the wall behind the desk, or an over-the-desk frame. Ask your landlord before drilling, and if you do mount it, keep the screws and anchors few and patch the holes before you move out.
Budget and Timing
A basic hardboard panel and a hook set usually cost very little, while wood and metal panels cost more. Budget a little extra for furring strips or a spacer kit, screws and paint. Mounting takes about an hour or two for a single board, including finding the studs and checking the level.
Where to Start If This Is Your First Time
Tape the outline of the board on the wall with painter’s tape and sit at your desk to check the height and reach. Find the studs inside that outline, check for pipes and wiring, then mount the strips or spacers. Start your home office pegboard wall with just five or six items and live with it for a week before adding more.
Common Mistakes to Avoid
- Mounting the board flat against the wall. Without a gap, hooks will not stay in.
- Missing the studs. Drywall alone may not hold a loaded board.
- Overloading it. Heavy items belong on shelves, not on a single hook.
- Filling every hole. Too many items look messy and make things harder to find.
FAQs
How far from the wall should a pegboard be? Most guides recommend at least a 1/2-inch gap so hooks can seat properly.
Do I need furring strips? Either furring strips or spacer kits work; both create the gap behind the board.
How high should a home office pegboard wall be? Start a few inches above the desk and keep the top within easy reach.
Can I paint pegboard? Yes, use a foam roller and a thin coat so the holes stay open.
Is pegboard renter-friendly? Freestanding or leaning panels are; wall-mounted boards need screws, so ask your landlord first.
How much weight can it hold? It depends on the board, the hardware and the studs, so check the product’s weight rating.
Tools and Basics to Gather
A tape measure, painter’s tape, a stud finder, a level, a drill, 1×2 furring strips or a spacer kit, screws and washers, and a set of pegboard hooks are all you need. Check for pipes and wiring before you drill, wear safety glasses, and never exceed the weight rating of your anchors.
Keeping It Organized Over Time
Once a month, take down anything you have not used and move items so the ones you reach for most sit closest to you. Because nothing is fixed, a home office pegboard wall can change as your work does, which is exactly why it stays useful long after other storage feels cluttered.
The Bottom Line
A home office pegboard wall is an easy, affordable way to clear your desk and use the wall above it. Leave at least a 1/2-inch gap, mount it into studs, center it over the desk and start with only the essentials. Get those basics right, and the board will stay neat, flexible and useful for years.
Related:
Desk Lamp Height for a Home Office: The Easy Test · Closet Home Office: 6 Steps That Make It Easy to Build