Limewash is having a real moment in 2026, and unlike a lot of wall treatments that need a professional, it’s genuinely achievable as a weekend DIY project. The appeal is simple: a limewashed wall has depth and softness that flat paint can’t match, without needing any actual texture underneath it.
These limewash paint ideas cover color, technique and prep — the details that determine whether the result looks intentionally textured or just uneven.
What Makes Limewash Different From Regular Paint
Limewash is made from lime, pigment and water rather than the synthetic binders in standard paint, which gives it a naturally mottled, cloudy appearance as it’s applied. Understanding this difference matters for every one of these limewash paint ideas, since the technique for applying it isn’t the same as rolling on a flat color.
1. Choose an Earthy Color Palette
Terracotta, cacao, dark olive, dusty indigo and rich chocolate brown are the colors defining most current limewash paint ideas, replacing starker, flatter tones from a few years ago. These earthy pigments work especially well with limewash because the mottled texture adds even more depth to an already warm color.
2. Prep the Wall Differently Than for Regular Paint
Limewash needs a slightly porous, properly primed surface to bond and develop its characteristic texture — a wall prepped exactly like it would be for flat paint won’t necessarily take limewash the same way. This is one of the limewash paint ideas most people skip by assuming regular paint prep is close enough.
3. Apply With a Natural Bristle Brush in Random Motions
Cross-hatching or random X-shaped brush strokes (rather than the even, directional strokes used for flat paint) are what create the characteristic mottled look. Of all the limewash paint ideas here, this is the technique that takes the most practice, so testing on a spare board first is worth the extra step.
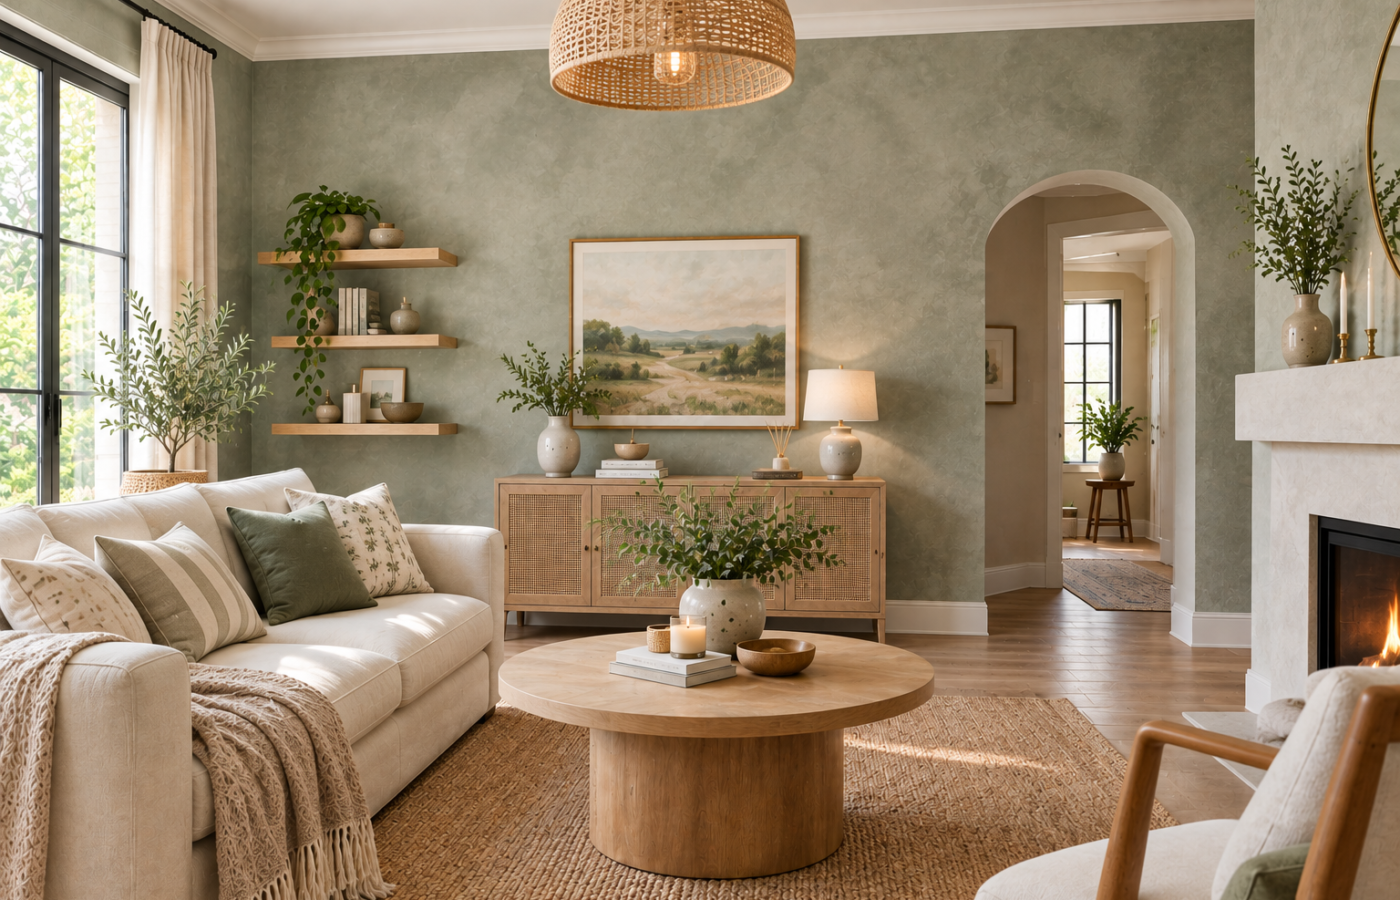
4. Embrace the Mottled, Cloudy Look
Unlike flat paint, limewash isn’t meant to look perfectly uniform — the variation in tone and texture is the entire point. New limewash painters sometimes fight this instinct and try to smooth it out, which undoes the effect all these limewash paint ideas are built around.
5. Try Color Drenching for a Fully Enveloped Room
Applying the same limewash color to walls, trim and sometimes even the ceiling — a technique called color drenching — makes a room feel fully wrapped in one tone rather than broken up by contrasting trim. This is one of the more dramatic limewash paint ideas, but it reads as more intentional than partial application in most rooms.
6. Always Test on a Small Section First
Limewash color can shift noticeably as it cures and as light changes throughout the day, so a small test patch left for 24-48 hours gives a far more accurate preview than judging the color while it’s still wet.
7. Seal Properly in High-Moisture Rooms
A breathable sealer is worth adding in a bathroom or kitchen, since raw limewash isn’t as moisture-resistant as standard paint on its own. This is a detail some limewash paint ideas skip, but it matters for anywhere with regular humidity or splashing.
Doing This as a Renter
Where a lease allows paint, limewash can be applied the same way any accent treatment would be, with the same expectation of repainting back to the original color at move-out. It pairs well with the same tape-and-prep approach behind accent wall painting, just with a different brush technique once the prep is done.
Budget and Timing
Limewash typically costs somewhat more per gallon than standard flat paint, but a single wall or accent area is still a manageable weekend budget. Plan for a full weekend rather than a single afternoon — most limewash paint ideas benefit from letting the first coat cure before assessing whether a second layer is needed for the depth of color and texture you’re going for.
Where to Start If This Is Your First Time
A small, low-stakes area — a powder room, a closet interior, a single accent wall — is a much more forgiving place to try any of these limewash paint ideas than a large open living space. The smaller surface area means less product used if the technique needs adjusting, and a lower cost if the first attempt needs a redo before moving on to a bigger room.
Layering Limewash With Existing Decor
Because limewash has so much built-in visual texture, the furniture and decor in a limewashed room generally work best kept simpler — busy patterns on top of an already-textured wall can compete rather than complement. Several of the most successful limewash paint ideas pair the wall with plain or lightly textured furniture, letting the paint finish carry the room’s visual interest.
Common Mistakes to Avoid
- Trying to make it look perfectly smooth. The mottled variation is the actual effect limewash paint ideas are built around — smoothing it out undoes the point.
- Skipping proper wall prep. Limewash needs different surface preparation than flat paint to bond and texture correctly.
- Judging color while the paint is still wet. Limewash shifts as it cures — always wait before making a final color decision.
- Ignoring moisture exposure. A breathable sealer matters in bathrooms and kitchens where raw limewash isn’t naturally as durable.
FAQs
Is limewash paint difficult to apply yourself? It’s more technique-dependent than flat paint, but genuinely achievable as a DIY project with practice on a test board before tackling the actual wall.
What colors are trending for limewash in 2026? Earthy tones — terracotta, cacao, dark olive, dusty indigo and chocolate brown — are the most common choices, replacing flatter, starker colors from previous years.
Does limewash paint work in a bathroom? Yes, with a breathable sealer added afterward — raw limewash isn’t as moisture-resistant as standard paint on its own.
What is color drenching? Applying the same limewash color to walls, trim and sometimes the ceiling, so the whole room reads as one enveloped tone rather than being broken up by contrasting trim.
How long does a limewash project take? Plan for a full weekend rather than a single afternoon — the technique itself takes longer than rolling flat paint, and the first coat needs time to cure before deciding if a second layer is needed.
Should I keep decor simple in a limewashed room? Generally yes — since the wall already carries significant texture and visual interest, simpler furniture and decor tend to let the paint finish stand out rather than compete with it.
Tools Worth Having Before You Start
A natural bristle brush (not a foam or synthetic one), a bucket for mixing, and a drop cloth for the inevitable drips cover the basics for most limewash paint ideas. Unlike flat paint, a roller isn’t the primary tool here — the brush technique is what creates the texture, so investing in a quality natural-bristle option makes a noticeable difference in the final result.
The Bottom Line
The best limewash paint ideas lean into the technique’s natural texture rather than fighting it — proper prep, a brush technique built for mottling, and an earthy color chosen with patience for how it shifts as it cures. Done this way, a single weekend of painting gives a wall more depth than several coats of flat color ever could.
Related:
Accent Wall Painting Tips: 5 Easy Moves for a Clean Finish · How to Paint a Room Like a Pro: Step-by-Step Weekend Guide